DoitNXS
Enthusiast
Hello,
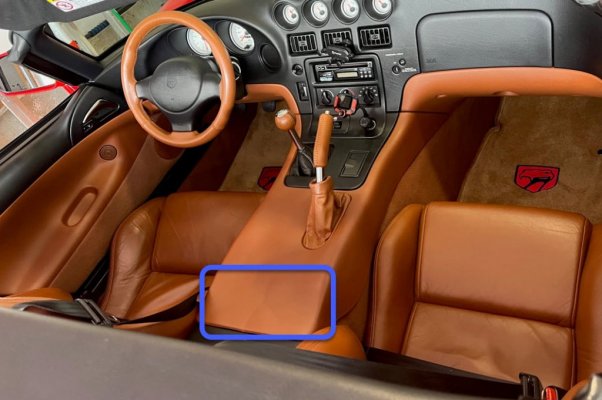
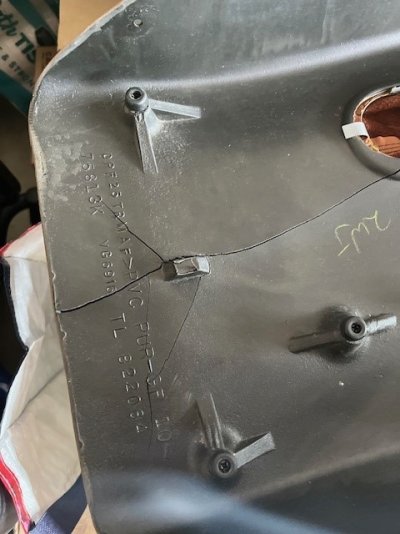
I have a 2001 RT10 and she is perfect. Except... the center console was cracked when I purchased her, and it was bad, obvious crack indentations were visible, and very fragile to the touch. This drove me insane, but it's easy to see how this could've been cracked because it's so wide, and I'm sure someone put their knee or elbow on there while trying to do something else. It wasn't until I removed the console to install a new short throw shifter when I realized the extent of the damage. The cracks went right through the plastic leaving only the vynil coating holding it together - I'm amazed that it didn't rip, I'm also amazed that Dodge didn't put something in the console to take up the gap between the metal console and the console itself instead of only 4 stanchions and all that real estate in between each one.
So here is how I fixed the problem. It did not make it look like new, but it removed the sunken look it had before, strengthened the cracked areas and also added much needed cushion to the gap space underneath the console. The entire repair cost less than 10 bucks and only a couple of hours to design and fabricate something simple. If your console is not yet cracked, you might want to do this to avoid it cracking in the future!!
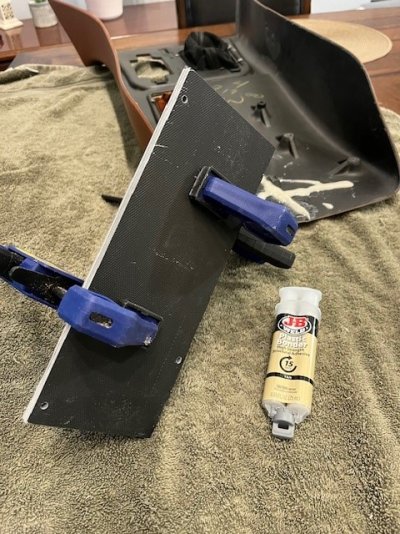
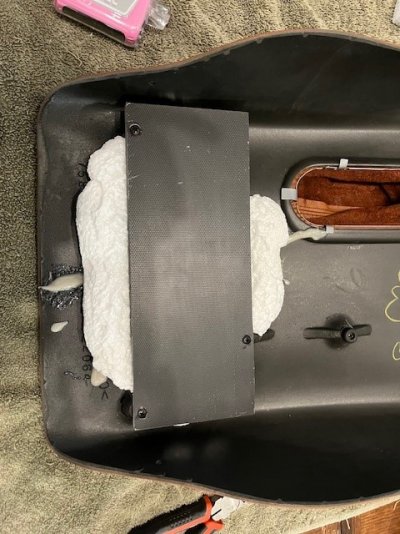
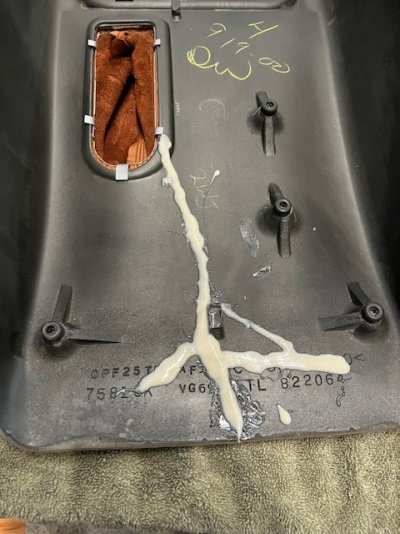
You'll need something for the bridge to attach to the console that will span across the open area of the metal console for the emergency brake; I used an extra slat or plank from the flooring I just installed in a spare room. It was just the right strength and a great material to work with. I cut a piece 4" x 10" and it was 1/8" thick. To take up the place of the grommets on the edge of the stanchions I doubled up so it's 1/4" and JB Welded them together.
Steps: Photos attached
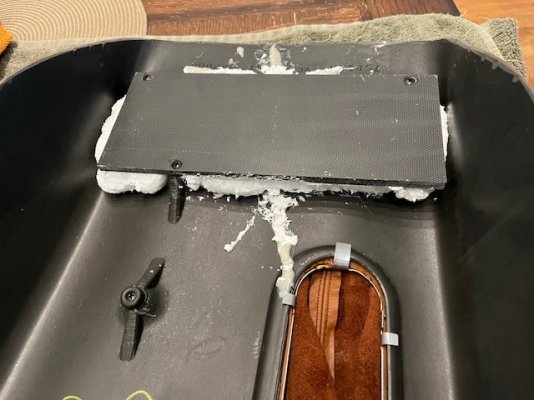
1. Create the bridge 10" x 4"
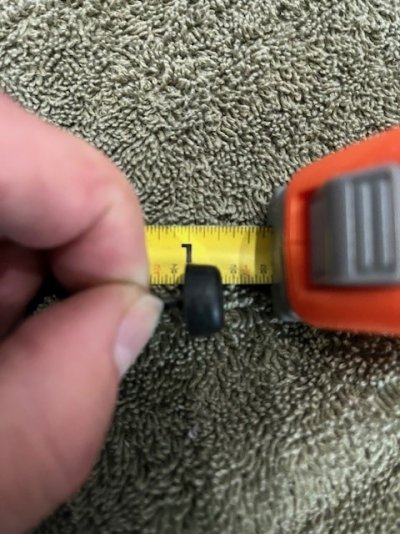
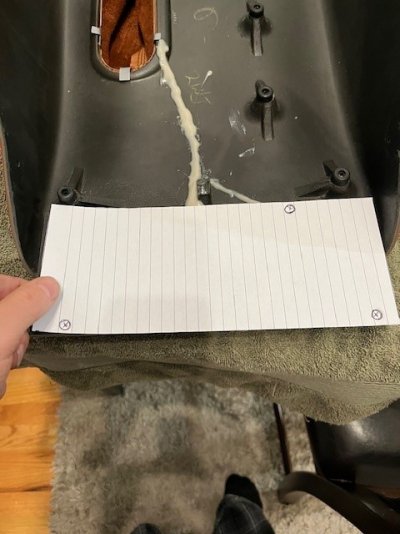
2. Using a sheet of paper create a template to drill the holes so you can attach it to the console and drill the holes making sure it matches up the screws on the stanchions that hold the 1/4" grommets
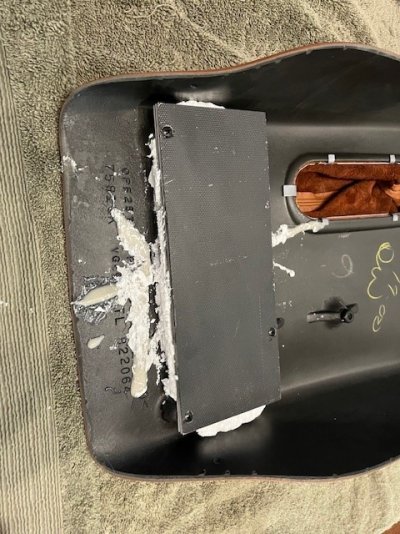
3. Repair any existing cracks in the console using JB Weld *I would advise using black, I used off white and I wish I used black - be sure to get the epoxy into the cracks and use masking tape to hold the console in shape while it fully cures for 24 hours
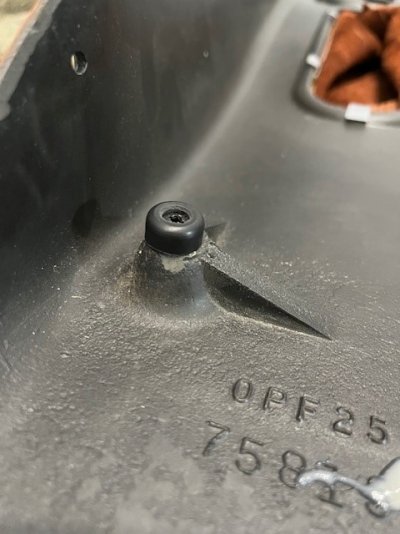
4. Remove the grommets from the stanchions and test for the bridge fitting and drilled holes line up
- Removed the grommets because the bridge was 1/4" thick and I needed to screw the bridge to the stanchions
5. Clean the areas between the bridge and the console
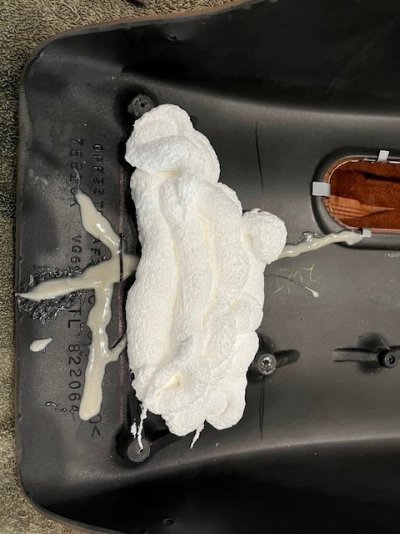
6. Using LocTite Foam Seal, lay down enough on the console so it's high enough so when you lay the bridge down on top it squashes some out the sides
- After 90 minutes you can trim the excess foam off *this stuff expands to twice it's size!
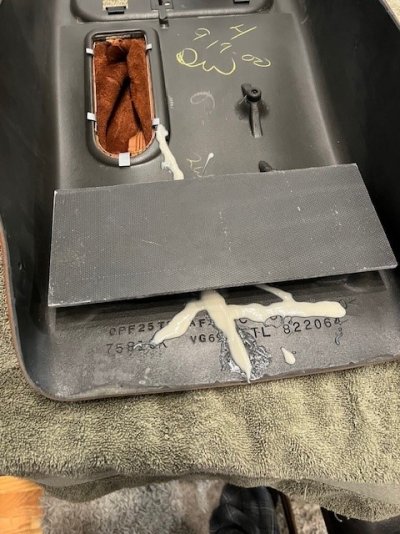
7. Install the bridge using #8 by 5/8" sheet metal screws and let it sit until the foam cures about 6-8 hours
8. Trim excess foam, visually inspect your work and install your new console
This is strong enough to hold a lot of weight now and you shouldn't have to worry about further damage and if your console is NOT cracked, you will have one hell of time trying to crack it.
Please reference the pictures as a guide and let me know if this helped you!
I have a 2001 RT10 and she is perfect. Except... the center console was cracked when I purchased her, and it was bad, obvious crack indentations were visible, and very fragile to the touch. This drove me insane, but it's easy to see how this could've been cracked because it's so wide, and I'm sure someone put their knee or elbow on there while trying to do something else. It wasn't until I removed the console to install a new short throw shifter when I realized the extent of the damage. The cracks went right through the plastic leaving only the vynil coating holding it together - I'm amazed that it didn't rip, I'm also amazed that Dodge didn't put something in the console to take up the gap between the metal console and the console itself instead of only 4 stanchions and all that real estate in between each one.
So here is how I fixed the problem. It did not make it look like new, but it removed the sunken look it had before, strengthened the cracked areas and also added much needed cushion to the gap space underneath the console. The entire repair cost less than 10 bucks and only a couple of hours to design and fabricate something simple. If your console is not yet cracked, you might want to do this to avoid it cracking in the future!!
You'll need something for the bridge to attach to the console that will span across the open area of the metal console for the emergency brake; I used an extra slat or plank from the flooring I just installed in a spare room. It was just the right strength and a great material to work with. I cut a piece 4" x 10" and it was 1/8" thick. To take up the place of the grommets on the edge of the stanchions I doubled up so it's 1/4" and JB Welded them together.
Steps: Photos attached
1. Create the bridge 10" x 4"
2. Using a sheet of paper create a template to drill the holes so you can attach it to the console and drill the holes making sure it matches up the screws on the stanchions that hold the 1/4" grommets
3. Repair any existing cracks in the console using JB Weld *I would advise using black, I used off white and I wish I used black - be sure to get the epoxy into the cracks and use masking tape to hold the console in shape while it fully cures for 24 hours
4. Remove the grommets from the stanchions and test for the bridge fitting and drilled holes line up
- Removed the grommets because the bridge was 1/4" thick and I needed to screw the bridge to the stanchions
5. Clean the areas between the bridge and the console
6. Using LocTite Foam Seal, lay down enough on the console so it's high enough so when you lay the bridge down on top it squashes some out the sides
- After 90 minutes you can trim the excess foam off *this stuff expands to twice it's size!
7. Install the bridge using #8 by 5/8" sheet metal screws and let it sit until the foam cures about 6-8 hours
8. Trim excess foam, visually inspect your work and install your new console
This is strong enough to hold a lot of weight now and you shouldn't have to worry about further damage and if your console is NOT cracked, you will have one hell of time trying to crack it.
Please reference the pictures as a guide and let me know if this helped you!
Attachments
Last edited: