Kit bashing time in 1:25

Vipuronr

Enthusiast
Joined
Apr 26, 2008
Posts
2,699
Reaction score
0
Isn't the GTS dashboard and firewall the same as the RT/10?
 
OP
OP
I

InjectTheVenom

Enthusiast
Joined
Mar 10, 2004
Posts
6,859
Reaction score
0
Nope, still waiting for someone to help me out with the gen 2 style dash and wheels.... WAY too stubborn to just plunk in the incorrect gen 1 stuff, sorry :)
 
OP
OP
I

InjectTheVenom

Enthusiast
Joined
Mar 10, 2004
Posts
6,859
Reaction score
0
*UCHE UCHE.. COUGH.. SNOTTER..*

Sorry, 9 month old dust bowl :D

I am still very much in need of help with replicating dasboard/wheels in 1:25 so if you know anyone who might be able to assist, please pm me because today I developed MAJOR plans for this project that will be of interest to all 1:1 gen 2 RT/10 owners!

Originally I only intended to construct 1 model but this morning I had to have my public transportation pass activated in the town where my usual hobby shop is also located, and on the way there it suddenly dawned on me... hey that body conversion turned out way better than originally expected... let's buy the remaining tools needed to finish the leftover work and get over your anxiety about DIY molds!


Still need to dig up info about the best way to start up a series production run. The result so far is not finished well enough to pull a good mold from so the current body is now labeled "prototype", I will be buying two more models and bash those together largely the same way to get rid of the present imperfections. Hood IS good enough with minor additional work... so there you have it!

Updates will follow when available, I would post pictures of my newly bought tools but the memory card in my camera stopped cooperating with my laptop :rant:
 
OP
OP
I

InjectTheVenom

Enthusiast
Joined
Mar 10, 2004
Posts
6,859
Reaction score
0
Not having given this any attention until my interest for the project regenerated by itself, this afternoon I finally found 2 Revell Monogram kits (RT/10 and GTS) for cheap on Ebay that are coming my way hopefully soon. The first attempt will be used to learn from so that the second attempt will become perfect enough to maybe pull a mold from and eventually work out a prototype model for Revell.

The same need for dashboard and wheels still exists :smirk:
 
OP
OP
I

InjectTheVenom

Enthusiast
Joined
Mar 10, 2004
Posts
6,859
Reaction score
0
RT/10 joined it today so the weekend planning will be cleared for a good looksie to determine a better way to join the 2 together.
 
OP
OP
I

InjectTheVenom

Enthusiast
Joined
Mar 10, 2004
Posts
6,859
Reaction score
0
The cuts have been made, the halves have been joined and the right side is now drying up from a thin layer of check-up paint to see if the seam is ok or that it needs more filler. Left side is only held in place with tape for now to keep things aligned, I am not unhappy so far it should be less correction work this time around because the cut has been made at a 90 degree angle to the line at the rear of the doors in a sort of straightened out Z shape.
 
OP
OP
I

InjectTheVenom

Enthusiast
Joined
Mar 10, 2004
Posts
6,859
Reaction score
0
Well that went fast..... left side is now also glued in place and the result looks ready for a mold making attempt! Am quite pleased with the result too!
 
OP
OP
I

InjectTheVenom

Enthusiast
Joined
Mar 10, 2004
Posts
6,859
Reaction score
0
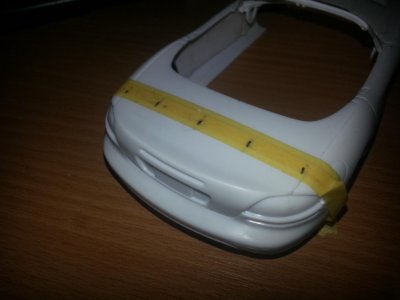
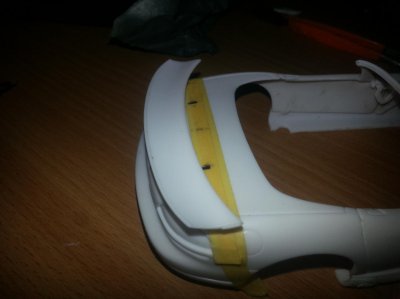
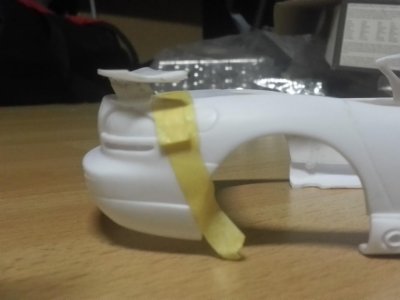
Before the chopping operation, tape is in place just aft of the doors to mark the cutting lines.

You must be registered for see images attach


Cut lines on the GTS. The pieces that are already gone needed to be removed so that my thin Tamiya modeling saw could make the next line.

You must be registered for see images attach


You must be registered for see images attach


You must be registered for see images


Cutting the RT was a little less easy but as you will see later this side turned out well, better than the right even.

You must be registered for see images attach


You must be registered for see images attach


Old and new together, new has a filler patch that was drying up.

You must be registered for see images attach


You must be registered for see images attach


You must be registered for see images attach


You must be registered for see images attach


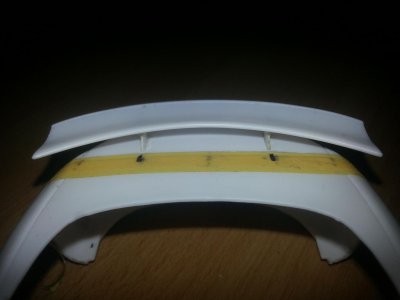
Where the new is at now. The dark line is where the saw cuts were made and runs just shy of the sportsbar. I had to glue in small tabs because I took a little too much liberty after the pillar.

You must be registered for see images attach


You must be registered for see images attach


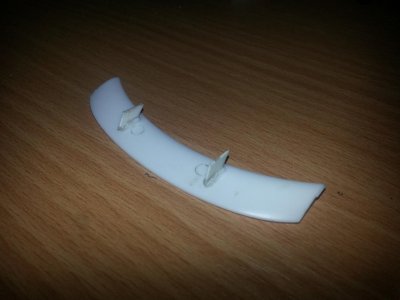
On the back of the cuts is a small slab of sheet styrene that was heated with a cigarette lighter for a few seconds and pushed into shape before being glued into place with cyano glue. Very rigid!


You must be registered for see images attach


You must be registered for see images attach
 
Last edited:
OP
OP
I

InjectTheVenom

Enthusiast
Joined
Mar 10, 2004
Posts
6,859
Reaction score
0
I just might build it up as far as possible, take it to VOI 12 and see if I run into any Chrysler marketing people :)
 
OP
OP
I

InjectTheVenom

Enthusiast
Joined
Mar 10, 2004
Posts
6,859
Reaction score
0
Thanks Mike :2tu: Which reminds me I still need to convert the hood and paint up 1 half to see if everything looks like it should.
 
OP
OP
I

InjectTheVenom

Enthusiast
Joined
Mar 10, 2004
Posts
6,859
Reaction score
0
While the original start of this topic is on hold until further notice, if a solution can be found for getting the correct shape and size of the lower wing risers the following should become an ACR convertable:

You must be registered for see images attach
 
OP
OP
I

InjectTheVenom

Enthusiast
Joined
Mar 10, 2004
Posts
6,859
Reaction score
0
First I would like to thank Python Pete for taking the time to measure the risers on his ACR convertable :2tu: Despite the tiny scale it is still important to get even the approximate shape right. It took a few tries to make the risers look like something and even more to attach them to the wing with fast drying cyano glue but the picknick table is on.

Trunklid width 5,7cm... space between risers 3cm... bit of computing before putting a few marks on Tamiya tape to line the wing out... believe I even got the angle right :)
 

Attachments

  • 20130915_185939.jpg
    20130915_185939.jpg
    90.8 KB · Views: 5
  • 20130915_190001.jpg
    20130915_190001.jpg
    87 KB · Views: 5
  • 20130915_200958.jpg
    20130915_200958.jpg
    85.4 KB · Views: 5
  • 20130915_201817.jpg
    20130915_201817.jpg
    81.3 KB · Views: 5
  • 20130915_202153_LLS.jpg
    20130915_202153_LLS.jpg
    75.7 KB · Views: 9
Top