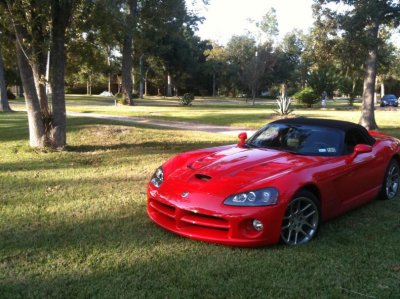
I was planning on posting a thread about my Viper needing a really good wash with a little help on a few swirls. I even have the pictures ready at home. I'll have to get the thread started tonight so I can do a before and after posting.
With some time off coming up for the holidays it was looking like a great time to finally get to really cleaning off the Viper. I still have rubber in some hard to reach places from the track at VOI 11.

Been out of town too much since to have time devoted to the cleaning.
I can't wait to watch over the videos. I saw the swirl removal videos a while back, but might just rewatch the whole series before I begin.
I was wondering if I was going to do a 2 bucket wash and work on removing some swirls do you still need to clay in between? It seems the work with removing swirls would also smooth out and remove imperfections as well. My paint is only 2 years old, so I don't think it's too bad, but it needs work before it gets worse. I was just wondering if I still needed to clay.
2 Bucket, clay, rinse, swirl, rinse, wax,
I think was the proposed process. It's just that claying looks like a LOT of elbow grease if you are doing a whole car.
First off, claying IS a lot of elbow grease but anything worth doing is worth doing right. Remember, we are not fixing Toyota's here, this is a Viper we are talking about. Thus, if your car needs to be clayed, you owe it to your paint.
With that said, we need to first get you a thorough understanding of what claying is, what it does and when it is necessary.
There is absolutely nothing that replaces the process of claying. Claying is the only thing that does what claying does so don't bother looking for a work around, there is none. You can find every thing you need to know about claying in a write-up I did
located here.
The detailing process that you mentioned should be crystal clear as to the order. Everything is done for a specific reason and in a specific order. Once you understand why you are doing what needs to be done, the order is common sense. This entire process is not something that you will do every time you detail your car. You only perform the steps necessary as they are called for when you inspect your paint.
An example that I like to use it with gas. You know that your car needs gas to run but you don't fill up the tank every time you dive it. You get in the car and look at the gas gauge. If it indicates that you have enough gas to get to your destination, you go to that destination, not to the gas station. Your paint is the same way. With a visual inspection (and the baggie test for indication of a need to clay), you are quickly informed as to what steps you are going to need to perform in order to get your paint in shape.
You should never be constantly repairing your paint. You repair your paint ONCE, and then properly maintain the paint from that point forward. The 2-bucket wash process is part of that maintenance that ensures that your paint remains swirl and scratch free. Yes, you will have to touch up your paint from time to time but you should never have to get as aggressive with your paint as you did the first time that you fixed it. That should be a one time process.
This is the order that you should perform that repairing process the first time that you perform it.
1. A 2-bucket wash (as described in this thread), using Dawn dish washing liquid to strip the finish of all waxes and dirt. This is done so that you don't prematurely contaminate your clay with unnecessary garbage. You want to get as much mileage out of your clay as possible so you remove everything off the car that can be removed by washing.
2. Properly clay the car. This may take more than one day. Don't be fooled into thinking that you can clay an entire car in a hour or so, especially if you are as old as I am. We ain't all spring chickens anymore.
3. Wash the car a second time using a car shampoo made for cars. This ensures that you are starting with a clean palate and not mistaking dried up clay lubrication for scratches. It also will remove any tiny clay particles.
4. Start the swirl, haze and scratch removing process. You will use a medium to heavy cutting polish with a orange to yellow cutting pad (unless you're using pads that don't conform to the industry standard). The polish and pads that you will use are determined by the amount of damage in your paint.
5. You will follow that medium to heavy cutting polish with a light cutting polish and a white pad (industry standard).
This combination is what repairs the damage that the heavy cutting pad and polish does to the paint. This is also what brings the paint to the shine that you will protect with wax. In the first picture that I posted of my car, it does not have a drop of wax on it. That is what your car should look like after a proper swirl removal with the orange pad, and polishing with the white pad.
Polishing is what makes paint shine, NOT waxing.
6. Apply the wax of your choice to protect the paint.
7. Follow with a beverage of your choice and a 30 piece wing dinner. Hey, I'm a growing boy.

crazy good outcome - hope my car never sees this thread
thanks for posting your fine vids

get a viper junkman
get a viper
get a viper junkman
get a viper
get a viper junkman
get a viper
Thanks for the great videos, Junkman.
You really need to come over to the dark side when you tire of that Vette.....
My mind and my wallet can't seem to agree! They are both on opposite sides of the spectrum with that decision!


 Fortunately, I consider that part of the "hobby"