Steve M

Enthusiast
Joined
Dec 29, 2011
Posts
1,071
Reaction score
202
Location
Dayton, OH

Introduction​

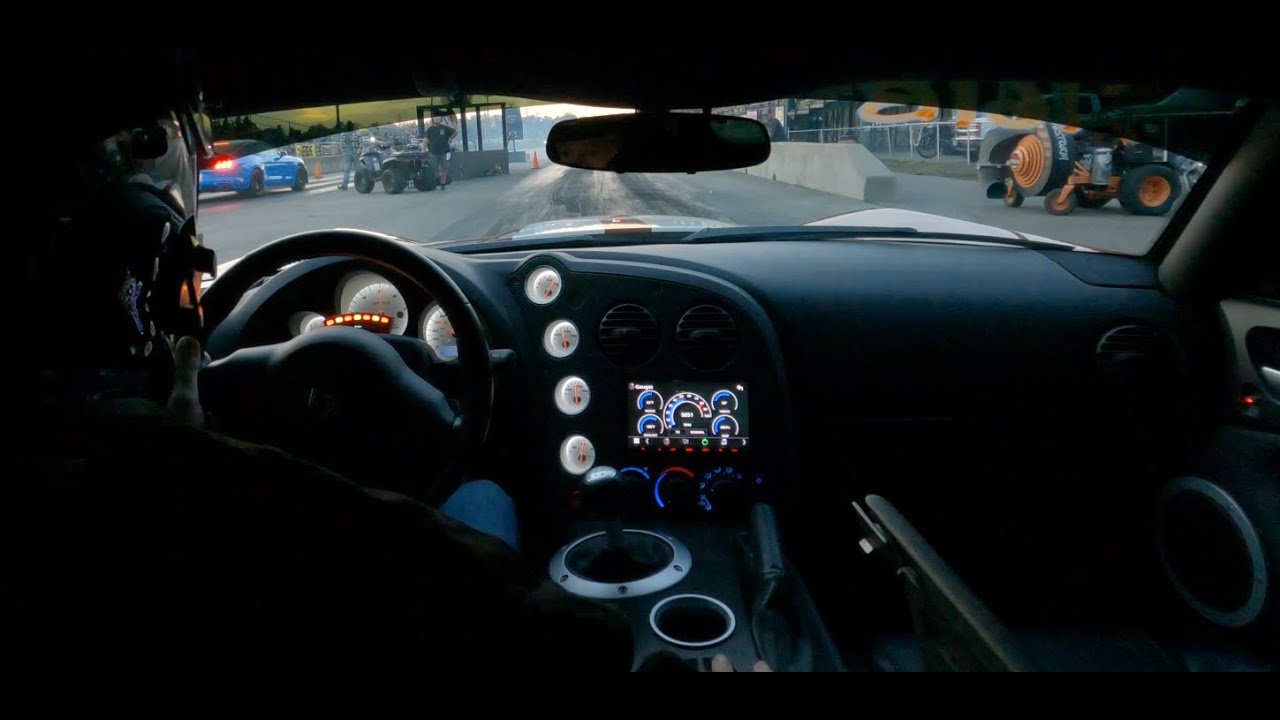
I installed a shift light many years ago when I started drag racing my 2008 Viper to help me hit my desired shift points in the quarter mile. I was quite pleased with how it turned out, and many others have felt the same way - it’s the one mod on my car people ask me about the most.

There are many different shift lights available out there, some better than others. The shift light I chose is an Ecliptech Shift-P2: https://ecliptech.com.au/shift-p2/

It isn’t the cheapest, but it is a very high-quality device – mine has worked flawlessly for years. It is an F1-style shift light with some very sophisticated electronics stuffed into a relatively small package that is easy to mount and even easier to set up. What really intrigued me, though, is how customizable it is. You can adjust pretty much everything to suit your desires: light colors, flashing sequences, flash rate, RPM on/off, etc. (more details here: https://ecliptech.com.au/wp-content/uploads/2016/12/Shift-P2-User-Manual.pdf). And just to be clear: I have no affiliation with this company or its products…I’m just very impressed with what they offer.

Here’s a quick video of it in action:


Now on to the install.
 
OP
OP
Steve M

Steve M

Enthusiast
Joined
Dec 29, 2011
Posts
1,071
Reaction score
202
Location
Dayton, OH

Installation​

The shift light needs a switched +12V power source, a ground, and an RPM signal. Tapping in to the RPM signal seems like it would be the most challenging part, but it’s actually quite easy – one company actually makes something that does just that with minimal effort: the MSD 8918 Tach Signal GMR Pickup (https://www.holley.com/products/gauges_and_gauge_accessories/tach_adapters/parts/8918).

The MSD 8918 simply clamps around the coil wire, so you don't end up having to splice/poke the vehicle wiring harness (i.e., it’s completely reversible, and won’t damage your OEM wiring). I clamped mine to the yellow with dark blue striped wire going into coil #9 on the driver's side:

You must be registered for see images attach


You can pick up the signal at any of the coil packs or directly from the ECM connector(s). This seemed like a good source of info for all generations of Vipers: https://www.raptorperformance.com/pages/raptor-shift-light-install-viper

Pertinent excerpt:

4TH GENERATION VIPER (2008-2010)

In 2008, Dodge went to coil on plug ignition coils. Connect the green wire of the shift light to only ONE of the 10 coil drivers. There are 4 connectors on the ECM (C1, C2, C3 and C4). You can connect at any coil or at the ECM.

ECM connector "C2" pin #1 to Coil driver #1- yellow wire with dark blue stripe
ECM connector "C2" pin #10, Coil driver #2- white wire with dark blue stripe
ECM connector "C1" pin #8, Coil driver #3- dark blue wire
ECM connector "C2" pin #9 Coil driver #4- Dark blue wire with gray stripe
ECM connector "C1" pin #3 Coil driver #5- dark blue wire with yellow stripe
ECM connector "C2" pin #7 Coil driver #6- dark blue wire with orange stripe
ECM connector "C1" pin #2 Coil driver #7- brown wire
ECM connector "C2" pin #3 Coil driver #8- dark blue wire with yellow stripe
ECM connector "C1" pin #1 Coil driver #9- yellow wire with dark blue stripe
ECM connector "C2" pin #2 Coil driver #10- orange wire with dark blue stripe

The MSD tach signal GMR pickup also requires power (switched +12V) and ground. The MSD signal wire connects to the blue wire of the Ecliptech shift light harness.

I ended up playing with the placement and wire routing for quite a while, and settled on this location:

You must be registered for see images attach


It's pretty light, so I just left it kind of wedged in that spot.

From there, you'll need to get that wire into the cabin...I chose to route it under the brake booster and into the large grommet that is wedged between the brake booster and the fender (no need to remove any body panels, but it does help if you remove the driver’s side sill). There's already a large wiring harness running in there, so you'll just need to poke a hole and shove the wires through. I'm hoping these next two pictures are worth 1,000 words (same spot, different angles):

You must be registered for see images attach


You must be registered for see images attach


Note the extra black wire...that's coming from my AEM wideband oxygen sensor.

I added some wire loom so it looks OEM-ish:

You must be registered for see images attach


You must be registered for see images attach


But Steve, where do you get a +12V switched source? I used an Add-a-Fuse (https://www.autozone.com/electrical...accessories/p/bussmann-atm-fuse-tap/32416_0_0) in the 15A Gauges slot here:

You must be registered for see images attach


That wire also ends up running into the cabin through the same hole.

Button everything up, and it's like it was there from the beginning:

You must be registered for see images attach


I chose to install my shift light on the steering column cover in front of the hazard light button. Here are a couple pics to show what I did to mount it using double sided foam tape:

You must be registered for see images attach


You must be registered for see images attach


I did end up drilling a 3/16" hole so I could hide the wires, but it looks like a cheap plastic part, so I figured why not? Fair warning: It does obstruct some of the tach - anything below about 1,500 RPMs in my normal seating position is not visible, but I never cared about that part of the tach anyway. It does not obstruct any of the speedo.

If it is a concern, one nice thing about this shift light is that the digital display in the middle will display engine RPMs real time, so you could at the very least monitor it digitally. Not perfect, but definitely not a deal breaker in my book. I've only driven the car a couple times with the shift light installed, and I haven't even noticed the tach obstruction, and I'm pretty particular about stuff like that.

As soon as I fired it up the first time, it immediately picked up the signal without me having to do anything. I adjusted a few of the settings, and off I went. That’s it!

 
OP
OP
Steve M

Steve M

Enthusiast
Joined
Dec 29, 2011
Posts
1,071
Reaction score
202
Location
Dayton, OH

Bonus – Ecliptech Shift P2+ Additional Functionality​

When you purchase the Ecliptech Shift P2, there’s an option to purchase a regular P2 or a P2+. A comparison chart with the differences is shown below:

You must be registered for see images attach


Fear not - If you buy the regular Shift P2 and later want to upgrade, you can simply purchase an unlock code rather than buy a completely separate unit. That’s a stand-up offer from a stand-up company.

Full disclosure: Ecliptech’s owner (Tony) saw my install post on another Viper forum a few years ago and offered me the unlock code for free in appreciation for the detailed write-up. I gladly took him up on that offer, but it took me a while to figure out how best to use the additional functionality.

I have a line-lock (a.k.a. roll control) that keeps my front brakes engaged to assist with burnouts at the drag strip. I wired up that line lock with two switches – the first is a simple on/off switch that arms the circuit, and the second switch is a momentary rocker switch that actually engages the solenoid, keeping the pressure on the front brakes after you let off of the brake pedal until you release the momentary switch. Both switches are located in my center console for easy access, but are out of the way so you can’t accidentally engage the line lock:

You must be registered for see images attach


I wanted to make sure this thing was idiot proof – I wanted to know immediately if the circuit was armed, and also when it went from just armed to actually engaged. The Ecliptech wiring harness has additional wires that allow you to bring in 3 channels of additional information (and by information, I mean voltage). The Shift P2+ allows you to take those channel inputs and display warning light sequences that are unique to each channel.

I ultimately decided I wanted to see warning lights when the circuit was engaged (but not armed), and a separate sequence of warning lights when the solenoid was engaged (i.e., the front brakes were locked). I sent an email to Tony at Ecliptech to see if my idea would work (and if I would need custom firmware), and he provided these helpful hints:

The channels work on the priority of 1, 2, 3. i.e. channel 1 has the highest priority and will always override other warnings. I would suggest to use channel 1 for the engaged momentary switch and channel 2 for the armed on/off switch. The labels used for the warning have to be short, otherwise they don't fit on the display in the large text size. You could use the letters "A" and "E" as an example.

There are currently 12 warnings light display patterns you can pick from. Have a look through them in case they might be of interest or help refine what you want.

Otherwise... I believe you can implement the function as you want. The only difference custom firmware could provide is with adding addition Armed and Enabled labels, and possibly alternative lights warning displays. They are a two-stage warning and need to have some element to flash to be consistent with them being a warning function. i.e 5 middle lights with the ones on each end flashing (even if the same colour).

When you set the warning threshold levels, make sure to pick levels for a guaranteed switch level. i.e. less than 5V, the input switch is off. Higher than 7.5V it's on. If you were to pick 0V and 12V... then the switch might only get to 0.01V, but never to exactly 0.00V due to ground offsets etc...

Cool.

Bottom line: the on/off “armed” switch comes in as channel 2, and the momentary “engaged” switch comes in as channel 1 (so it overrides the first warning light sequence).

If a picture is worth a thousand words, a video must be worth a bit more. Here it is in action:


Latest posts

Members online

Forum statistics

Threads
153,200
Posts
1,681,923
Members
17,698
Latest member
Tombala
Top